

About a year ago I had to create a login feature for an application. This was a considerable amount of work because, apart from the actual form fields, it had to check in the database whether or not the user existed and if his password was a match. To do this, I let the user register and saved his credentials in a MongoDB database. To increase the security we implemented a password hashing method and created fail saved incase the user forgot his password.
For my current project, I'm working on an application that shows a Dungeon and Dragons (DnD) map and lets users show their location on that map. You can also roll dice and share messages with your online DnD group. For this project, I want users to be able to login. However, my deadline is very tight, and I won't have enough time to go through all the login hassle as I did last year.
Luckily there is an easier way… Firebase authentication. In my DnD application, I also needed a database to store data and since Firebase is such a database but also comes with an authentication feature, it offered a great solution for my login ‘problem’.
Adding Firebase to my application
Using Firebase is fairly easy when you have done it more than once. It does however require some steps to setup that makes it more difficult to apply the first time. Luckily, the Firebase documentation is a great help and guides you through these steps. In this article, I will give some insight into the steps I took to add Firebase to my project and use its authentication feature.
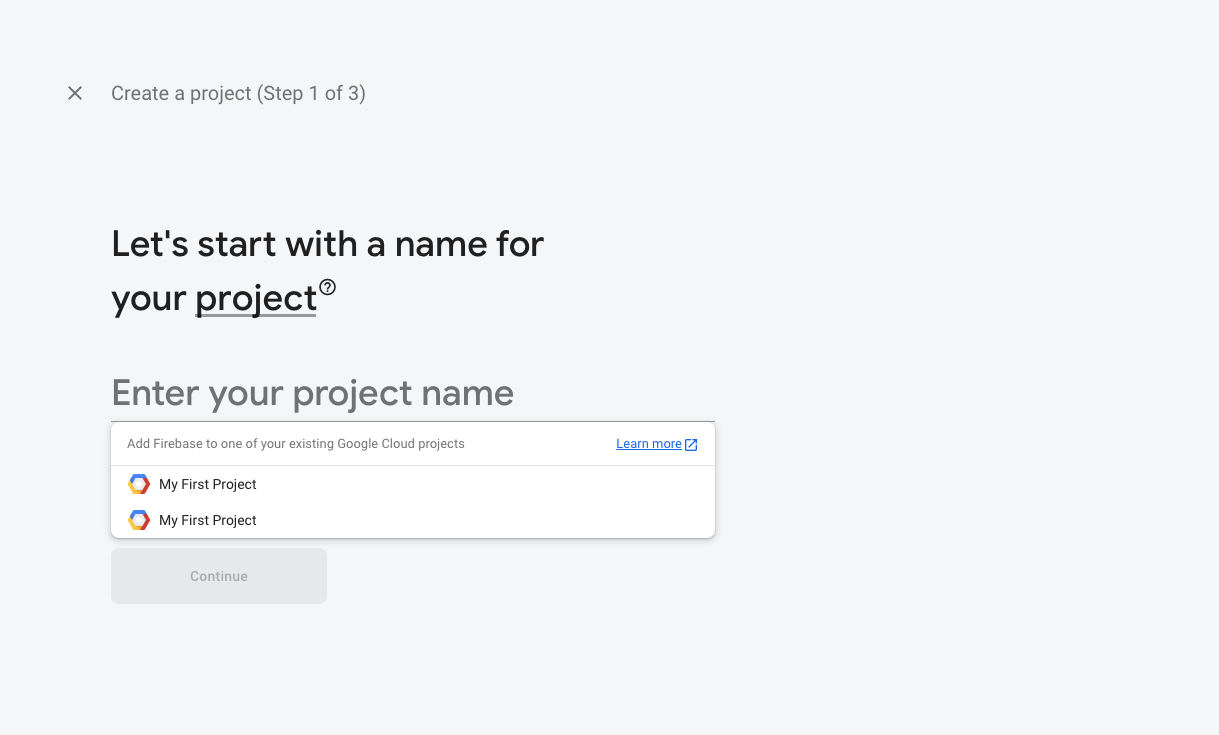
The first step was to create a new project in the Firebase console.
The next step was to connect the app with Firebase. To connect my app I had to choose between iOS, Android or Web. Since my DnD app is a web application I went with the web option. The next step was naming my app and firebase gave me the option to set up Firebase Hosting. This option lets you deploy your application. I won’t go into Firebase Hosting, but it might be worth considering if you haven’t already deployed your app.
After finishing these steps I received some script tags to connect my application with Firebase.
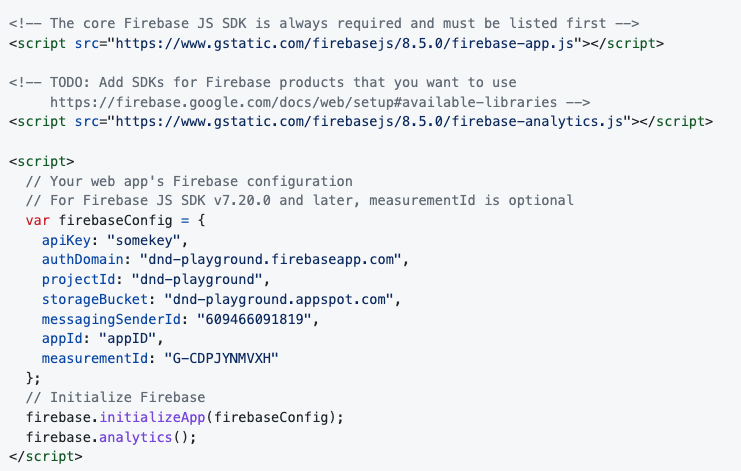
Once I had completed these steps, I could start using Firebase in my client-side javascript.
Login with Firebase Authentication
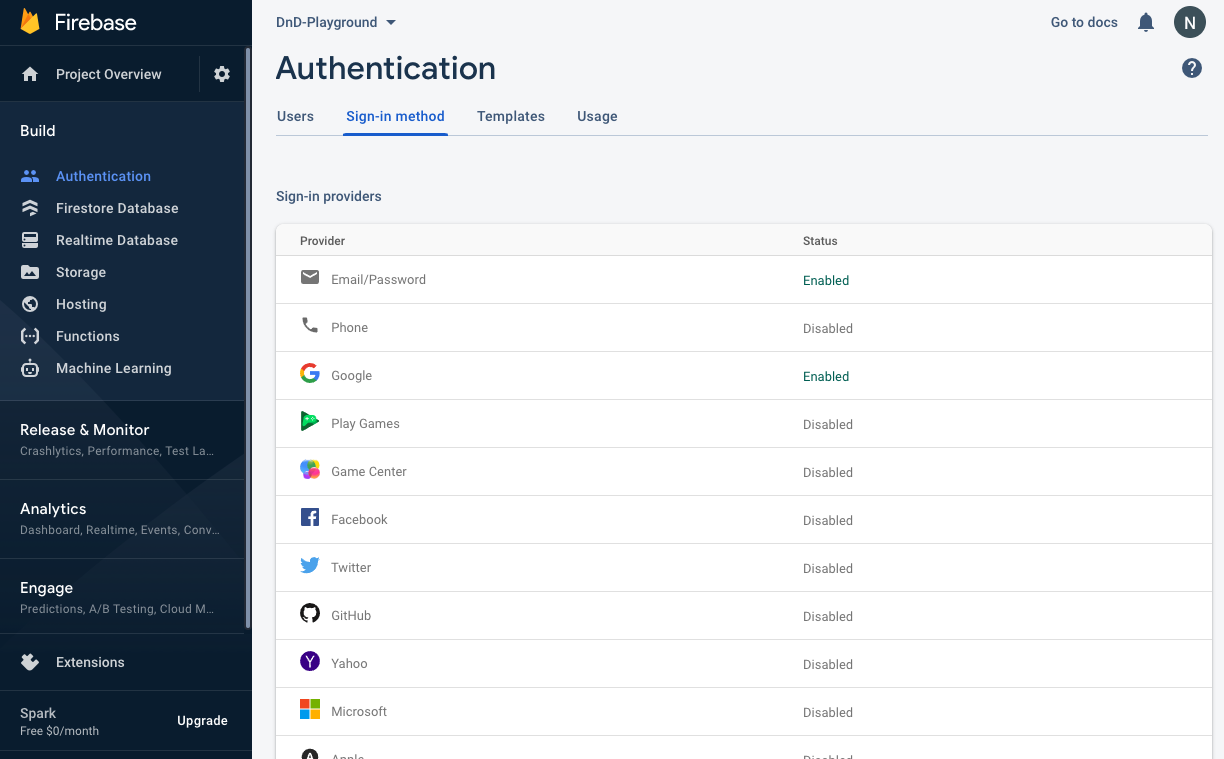
Although setting up Firebase in my application cost some time, adding a login feature went magically fast. For my app I only created a Google login, but you can add others like Facebook, Twitter, Github, Microsoft etc..
To use any of these, in my case Google, I had to go into my Firebase console, go to Authentication and then to the Sign-in method page. Here you will see a list of available login methods that you have to enable before you can use them. This is very easy, by clicking on the Google option I could simply enable it by using the toggle.
Now everything has been set-up it’s time to use this login on the application. First, I created a login button in HTML and styled it with CSS. Then I added an event listener to this button. Once it is clicked, it will execute a certain function called ‘googleSignIn’.
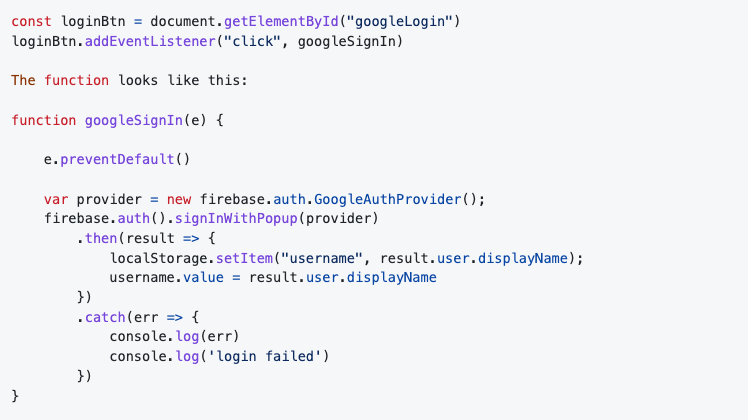
My button lives in a form, so first of all I prevent the default behavior, which is sending the form and redirecting me to another page because I want the user to stay on the same page and receive, in this case, a pop-up login window to login.
To handle the sign-in flow I had to create an instance of the Google provider object. This is the variable ‘provider’. After that, I let Firebase start an authentication by using a pop-up with a sign in. You can also choose for a sign in with redirection, then you will be redirected to a Google sign-in page, once you have been signed in there, you will be redirected back to your web application. But I preferred the pop-up method because it keeps the user in your application environment.
Once the user is logged in, I updated the username in the DnD Application to the name from the account that has been logged in. This is done by resolving a promise, since logging in a user happens asynchronous.
Using different login methods is pretty easy now that I have setup this google login. I only have to
change the provider variable to change the method. For example, if I wanted to use a Facebook login
instead, I could replicate the code and change the provider variable to:
var provider = new firebase.auth.FacebookAuthProvider();
When a user has logged in, you get a bunch of information about him. The information example below is from my own account with a Google login.
                    additionalUserInfo: Wr
                isNewUser: false


                profile:
                email: "Nathan.neelis@hva.nl"
                family_name: "Neelis"
                given_name: "Nathan"
                granted_scopes: "https://www.googleapis.com/auth/userinfo.email https://www.googleapis.com/auth/userinfo.profile openid"
                id: "112969141390938316214"
                locale: "nl"
                name: "Nathan Neelis"
                picture: "https://lh3.googleusercontent.com/a/AATXAJy3r_bfMNdh4LF1cTsqaYzVKRKJncY3dphEjTMe=s96-c"
                verified_email: true
You can also request more information about the user that is logging in. But you have to be careful
with that as you are requesting personal information and it might scare off the user. However, in
case you really do need this information, you could add this scope to the provider variable like
this:
provider.addScope('user_birthday');
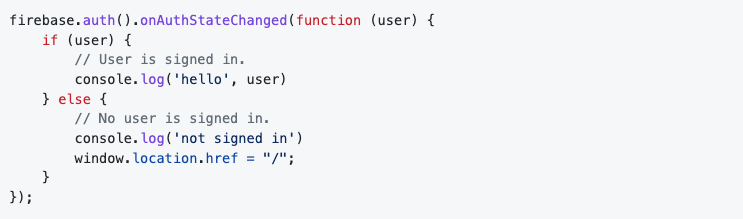
Last but not least, I can also check if the user is logged in on other pages. In my application, if they’re not logged in, they will be redirected to the login page. In the code example below you will see that, if a user exists, there will be a console log that shows the user information. If it doesn’t exist, the user will be redirected to the homepage which, in my case, is also the login page.
Conclusion
Firebase is a really good alternative to creating your own login feature. It saves time and errors because you don’t have to think about registering, forgotten passwords and the difficult task of storing passwords save and secure.
In this project, I used Firebase for the first time, and it was a lot more work than it will be the next time. I had to read lots of documentation and had to figure out that all of the authentication processes are happening on the client-side. This took me some time to figure out because I was trying to make it work on the server-side, like I would for a MongoDB database. But once I made this connection, it all became clear and understandable. The Firebase documentation is a big help but the first time you really have to go ‘through’ it.
I also think there is a lot more possible with regards to creating a login feature with Firebase. But in this article, I covered the basics on how I got it working.